|
|
Stabilizing video
Videos shot on handheld cameras often look shaky and unstable, no matter how hard you try to keep the camera level, especially if you're filming sports using a portative action camera such as a GoPro®. To remove camera shake from your videos:
Enter edit mode
Click the Edit button next to the file your file and switch to the Stabilization tab or select Stabilization in the Tools tab.

Set up stabilization
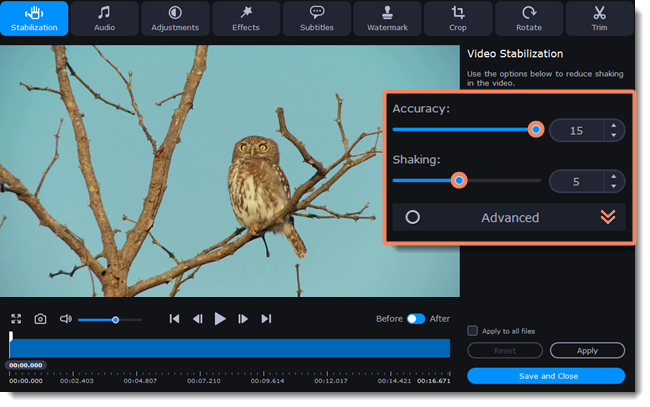
Set up stabilization with the following parameters depending on the video and the amount of shaking:
Accuracy: affects the analysis precision of the video. Higher accuracy yields the best results, but also takes more time.
Shaking: set how strongly the shaking is visible on the video.
If you need more advanced settings, click the arrow under the sliders.

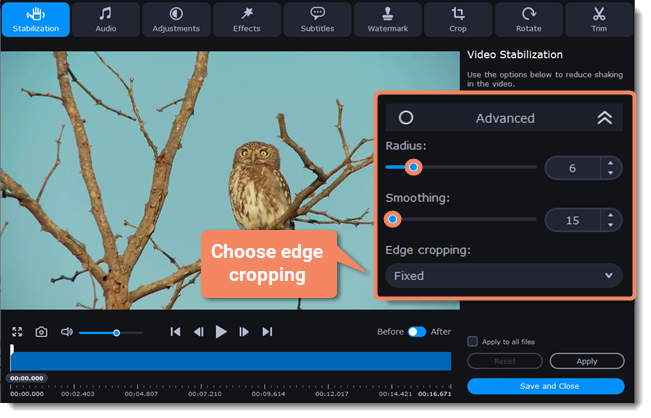
Radius: when a video is stabilized, each object is adjusted using the pixels from the surrounding area. The radius affects how large that area will be. Use a smaller value for more dynamic videos to avoid mixing objects together and to preserve more detail.
Smoothing: limits camera acceleration. Higher values work best for more or less static videos. Excessive smoothing may limit panning.
Edge Cropping: after compensating for motion, some distortion artefacts like blurred areas may appear around the edges.
-
None: the edges will remain as they are. Best results if there is little shaking on the video.
-
Fixed: the video is cropped to one size to cut off some of the edges.
-
Adaptive: whenever there is a lot of shaking, the video will zoom in so that the distorted edges are not shown.

Exit edit mode
-
Click Apply to accept the changes. If you have several similar files, select Apply to all files to stabilize them in the same way.
-
If you're finished editing the file, click Save and Close to go back to the main window. Stabilization will only take effect after you convert the videos.


