|
|
Quick start guide
Convert 360° files
Connect the camera to your computer and copy the 360° files to your hard drive. Before you can edit the videos, you may need to convert them using the software that came with your camera. Different cameras shoot 360° video in different formats, and the videos must first be "stitched" to join the footage from all lenses into a single spherical video. If you aren't sure how to do this, check your camera's user manual.

Add 360° video to the Editor
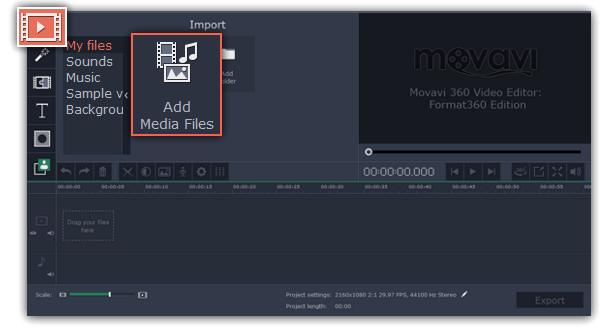
On the Import tab of Movavi 360 Video Editor Click Add Media Files and choose the 360° videos you want to use in your project. They will appear on the Timeline in the bottom part of the window. The order and length of files on the Timeline determines their appearance in the finished video.
View 360° video
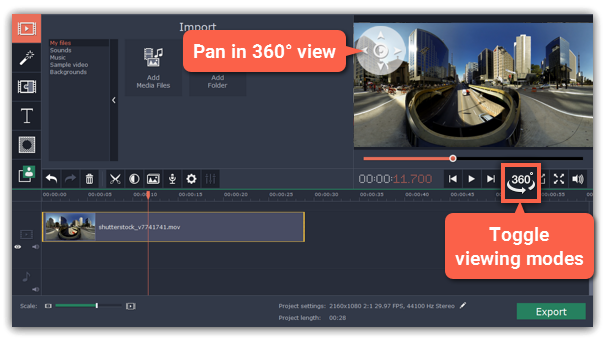
360° videos can be viewed in equirectangular and 360° modes. To switch between the viewing modes, click the 360° button under the player.
Equirectangular mode – the entire video frame is visible in the player, however, objects may appear distorted. This mode is useful for placing titles and other objects on the video, where it is necessary to view the entire scene.
360° mode – the video appears in a natural 360° projection and you can only see a part of the video at once. To navigate the 360° scene, click and drag your mouse over the player, or use the directional buttons in the upper left-hand corner of the player.
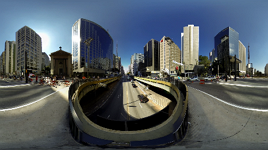
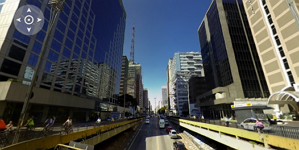
Equirectangular and 360° mode
Edit 360° video
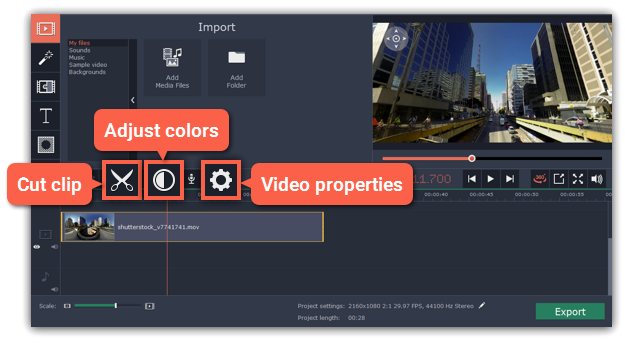
Use the buttons on the toolbar to make quick adjustments to the videos and images. To cut a clip into two parts, place the position marker where you want to make the cut and click the scissors button.
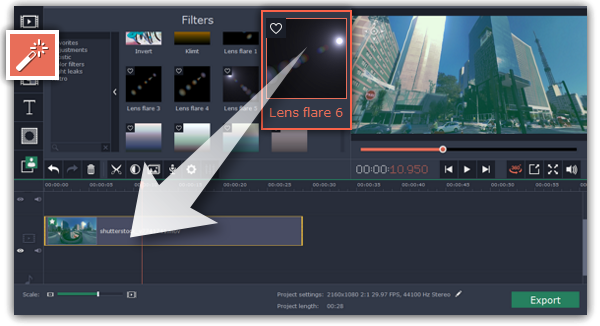
Add filters
Next, why not add some creativity and apply a color filter or a cool effect to your video. To do that, click the Filters button on the left and pick a filter you like. Then, drag the filter's icon onto the clip on the Timeline to apply it.
Learn more: Filters
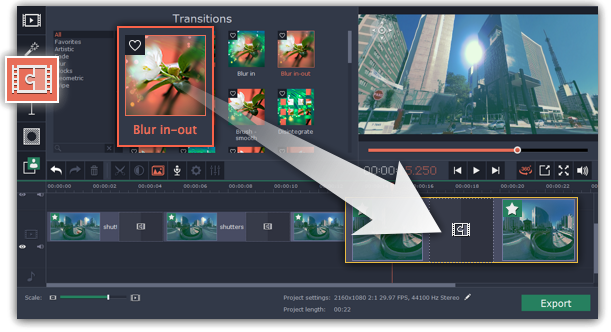
Add transitions
You can join even 360° clips with animations to transition from one clip to another. Click the Transitions button on the left sidebar to open the list of transitions. Pick a transition and drag its icon onto the Timeline, between the clips you want to join.
Learn more: Transitions
Add annotations
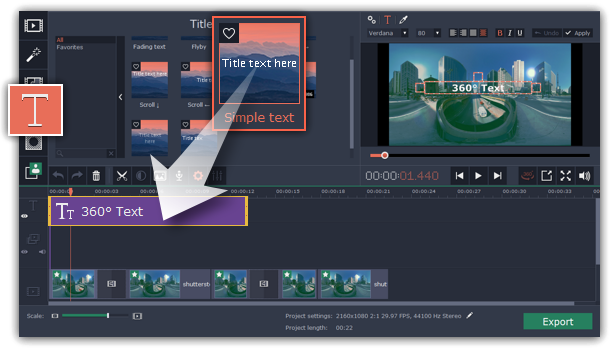
Click the Titles button on the left to open the list of text styles for your 360° video. Drag a style's thumbnail onto the uppermost track of the Timeline above the clips you want to annotate. Text clips appear as purple ribbons on the titles track. To edit the text, double-click the titles clip and type the text in the player. Use the toolbar at the top of the player to change the font, size, and color of the text.
Learn more: Titles
Add music and edit audio
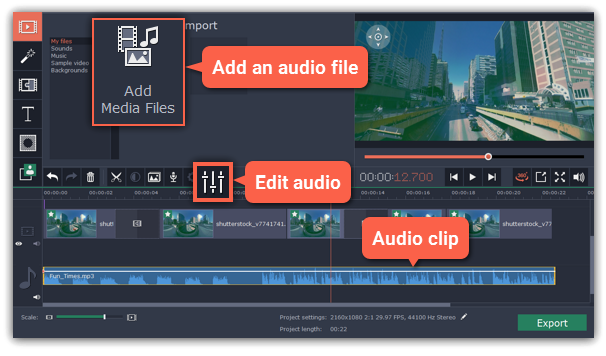
Click Add Media Files on the Import tab to add music from audio files. Added audio clips will appear on the audio track of the Timeline. To edit audio, select a clip and click the Audio Properties button on the toolbar. Here, you can edit volume, fade sound, and apply audio effects.
Learn more: Editing audio
Save and share
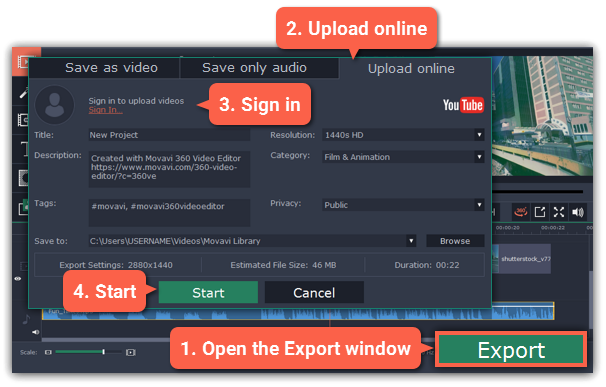
When you're finished with your 360° video, it's time to save it for playback or upload it to YouTube. Click the Export button in the bottom right-hand corner to open the saving options. If you want to save just the video file, use the Save as video tab and choose a video format for saving your 360° file. If you want to share the video on YouTube, switch to the Upload online tab, click Sign in at the top to authenticate with YouTube, and enter the name, description, and other details for your YouTube video.
Then, choose a location for saving the video file (a video file will also be saved to your hard drive even if you're uploading to YouTube) and click Start to begin processing the 360° video. Note that not all media players support viewing 360° video.
