
|
|
Burn a video DVD
Step 1: Open the Burn Disc application in Video mode
1. Click Burn disc on the Data tab of the Movavi Video Suite launcher app.
2. The Burn Disc application will open. There, click on the Video tab at the top.
Step 2: Choose your disc type
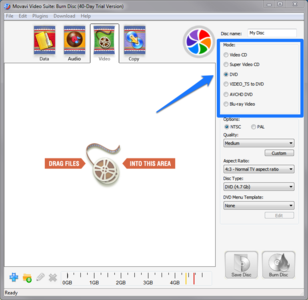
In the Mode section of the right-hand column, choose DVD mode.
Step 3: Add the files you want to burn
-
Drag-and-drop files onto the ChilIBurner window, or
-
In the bottom left-hand corner, click the plus icon
 to add a file, or the folder icon
  to add the contents of one or more folders to the list.
Step 4: Set up your disc preferences
Set the following preferences in the right-hand part of the window:
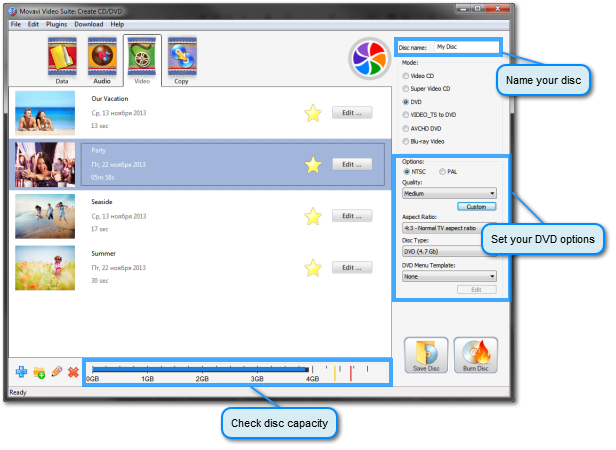
Disc name – located at the very top of the panel. You will see this as the name of the disc drive when you insert the DVD into your computer or DVD player.
NTSC or PAL – select the TV standard depending on the DVD player you have or the country you live in.
-
NTSC is used in North and Central America, most countries of South America (excluding Argentina and Brazil), Burma, Japan, the Philippines, South Korea, Taiwan, and Vietnam.
-
PAL is used in all countries of Africa, Europe, Oceania, and the Middle East, most Asian countries, as well as in Argentina, Brazil, Paraguay, Uruguay, and French Guiana
Quality – this parameter affects video and audio bitrate. Higher quality requires more disc space.
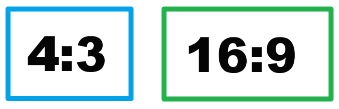
Aspect ratio – the ratio between the width and height of the video's frame. 4:3 is the standard format used for TV, while 16:9 is used for widescreen movies.
Disc type – select DVD if you have a regular DVD disc, or DVD DL if you have a double-layer DVD (it should be written somewhere on the package your DVD came with).
DVD menu template – the DVD menu is the first thing you see when you open a disc on your player, and where you can select which file to play. The ChilIBurner module allows you to select and customize professional-looking DVD menus. By default, only one theme will be available, but you can select Download More Themes from the list and download additional themes from our official website. If you want to customize or preview the selected theme, click Edit. You will see the following window:
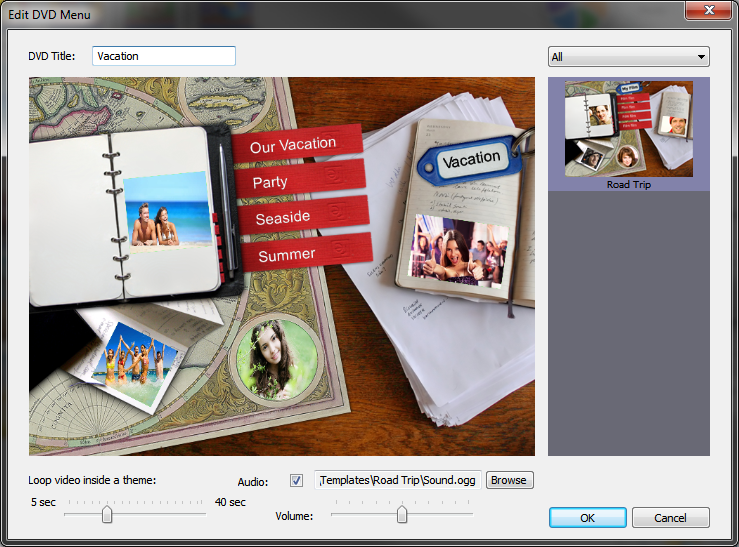
Here, you can set the time for the previews of each video and change the music that will play in the menu. Click OK to apply the changes.
Step 5: Burn disc
At the bottom of the ChilIBurner window, there is a disc capacity scale. The blue line reflects how much of the disc you will fill when you record the videos, while the yellow and red lines display the maximum capacity of the selected disc type.

Make sure that you have not exceeded the disc capacity. To free up some space, you can delete files from the list or slightly reduce quality.
Then, check that you have a writable DVD in your DVD drive and click the Burn Disc button to begin the burning process. Your disc will be ready in a few minutes.

